How to Organize Media & Asset Library Using Eagle App Review
Eagle is an app that lets you create a media and asset library, then organize and browse it easily using filters and categories. I use it daily to store and grab textures, materials, and assets, and bring them into C4D or Houdini with a quick click and drag. It also serves me as a bank for inspiration in and out of 3D.
Overview of Eagle App Interface
Image from: Rolando Barry
What is Eagle?
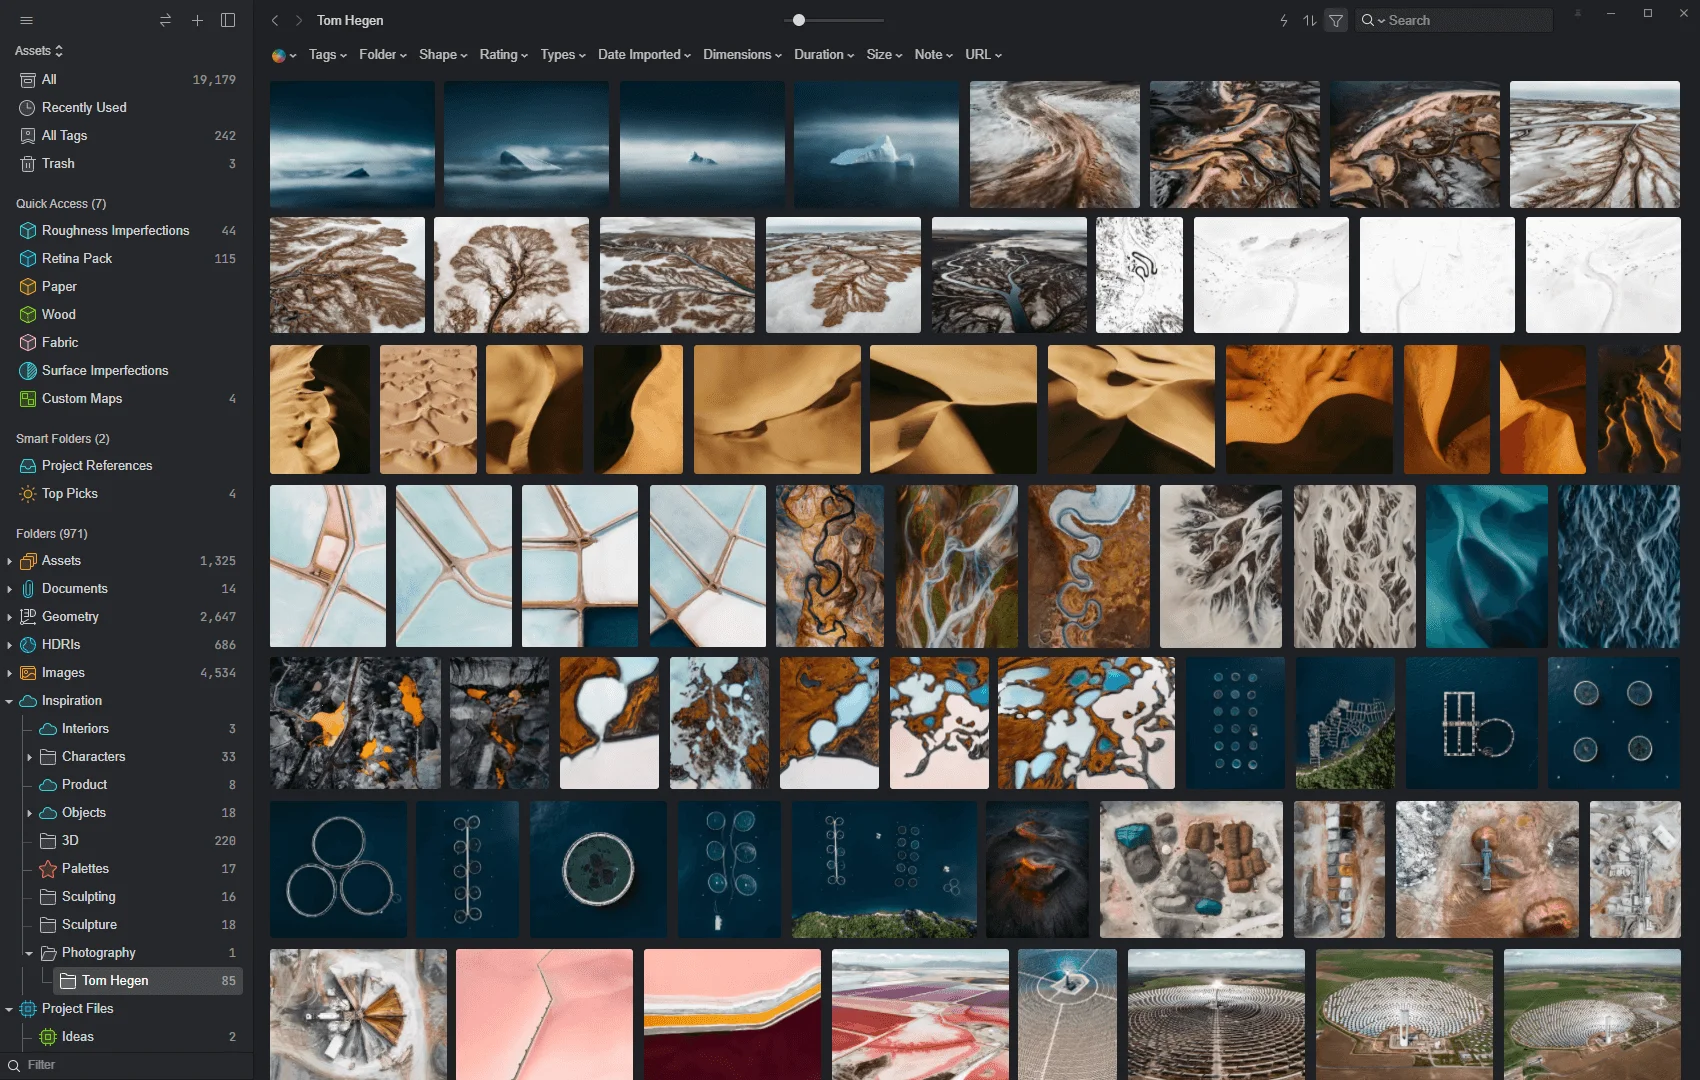
Image from Rolando Barry, Photography by Tom Hegen https://www.tomhegen.com/
Eagle is a library - not just for images, but also videos, vectors, 3D objects, assets, HDRIs, documents, inspiration, and all else. It is my everyday driver to store inspiring images, to grab and look for textures and references when I’m working, and even to save some tips and tricks about programs I use, in the form of screen recordings or even c4d files.
How does Eagle App work?
Eagle will create a library folder in the location of your choosing. Inside this library folder, it will store all the images, videos and files you throw at it. When you open the app, you will see a sidebar to the left where you can create folders, subfolders, smart folders, quick access folders and some categories.
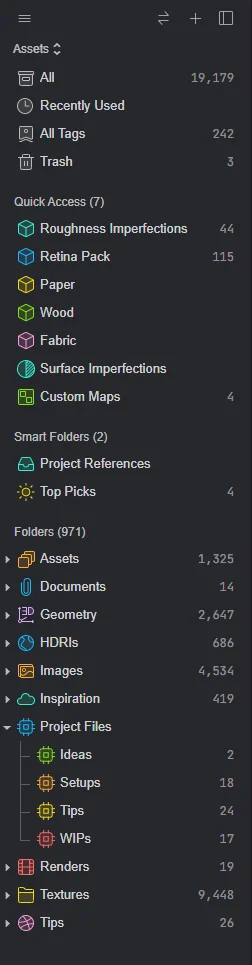
Image from: Rolando Barry - This is my current structure, but you can make your own from scratch.

Image from Rolando Barry - You can choose which general folders show by default.
What can Eagle App do?
On its most simple terms, think of it as a super-powered finder/explorer for your images and media. It is incredibly snappy and you can browse through hundreds and thousands of images without breaking a sweat. Preview, check metadata, copy, duplicate, delete and manage an entire library. Where Eagle shines its brightest is in the filtering and categorising of images:
Image from Rolando Barry, , Eagle will let you filter through colors! Especially useful if you’re looking for a specific mood, palette or gradient.
Image from Rolando Barry, , The filtering capabilities are quite wild to pin down any specific image in your library.
When it comes to previewing media, it has very good compatibility with most types of files, and some surprising ones.

Image from Rolando Barry
Image from Rolando Barry, The .obj and .fbx support comes in pretty clutch when browsing my 3D model library.
Tags are super important! Assigning tags to your files will let you browse them by using specific keywords, or automatically appear in dedicated smart folders. For people like me who aren’t very consistent with applying tags, Eagle does a good job assigning some automatic tags to files based on metadata too, and you can create "Quick Actions" to assign multiple tags to many files at the same time.

Image from Rolando Barry
Each file has its own data, rating, tags, description and some extra info. It will even display an approximate color palette from the image or video. If you’ve saved it using the Eagle extension for your browser, it will also save the URL where you got it from, so you can always go back and reference where you got that image. Like I just did! 😅 Thank you to Agata Karelus for these amazing characters made with affinity. Check her project here.

Image from Rolando Barry, , Character by Agata Karelus

Image from Rolando Barry, , Character by Agata Karelus
How can I customize Eagle App?
There are plenty of options for customizing Eagle. From appearance, to theme, to how much info you want to display for each item in the thumbnail view. Here are three screenshots of Eagle:

Image from Rolando Barry, White BG, Justified

Image from Rolando Barry, Grey background, Grid, Showing Information and both side panels open.

Image from Rolando Barry - Light Grey background, List mode, all info shown, left side panel open.
My preferred view is no info & justified with black background. Then I toggle the inspector and information bar using a keyboard shortcut.
How I use Eagle App as a 3D artist.
For inspiration
As I mentioned before, I use Eagle on a daily basis. Starting with the extension for browsers, I can easily click and drag any image while I am browsing Instagram, Behance, or whichever website, and the Eagle prompt will show up, asking me if I want to drop the image into any particular folder. Like we saw earlier, this will save the URL and some basic tags already to easily categorize the image.

Image from Rolando Barry
Any other image that I get I can just place manually in one of the folders by clicking and dragging it inside the app.

Image from Rolando Barry
I like to organize my inspiration folders by medium. Sometimes it’s very nice to look at other things people have made in 3D, but it’s also refreshing and a great exercise to just look at other mediums like photography, film, and 2D illustration to find new sources for inspiration and ideas. More often than not, these are just folders for me to go through and remember how pretty things can be, so that I can look back at my work and ~~cry~~ take things up a notch.
While working
When I’m working, Eagle is usually open on my second monitor. Whether it is to put up references for the frames I’m working on, to review renders I’ve already made, or to actively browse textures and materials for my ongoing render. For instance, I keep some materials (those with more than 1 texture channel) in the same subfolder. This way I can keep the textures tidy, and also reference them through the thumbnails before looking on each folder. This is especially the case for some of the Quixel materials I’ve gathered over time.

Image from Rolando Barry
Other times I just want to look at different types of the same material. You can choose which particular image you want to have as the “subfolder thumbnail” so that you’ll always know which material you’re browsing at on a first look.

Image from Rolando Barry
Then all the different channels are inside the subfolder, so you can just grab them and drag them into your node manager.
Image from Rolando Barry
When it comes to other textures like surface imperfections, displacements, dust, dirt, etc… Having a visual aid when choosing between 200 seemingly identical textures just gives you that extra level of information that can really help nail your first pick vs. picking always the ‘same, safe one’, double clicking each and every one, or just “I’m feeling Lucky”-ing it.

Image from Rolando Barry
For cataloguing
Recently, I’ve started using Eagle not just for before and during my process, but also for afterwards. Cataloguing and rating my renders helps me a great deal later when I want to use them for my website, to showcase, or just to share with people / post later. Before Eagle, I kept all my renders inside folders, inside projects. Now, I just make a subfolder per project that consists only of the renders and videos that I want to keep. As a plus, these are copied over to the Eagle Library, so I don’t need to modify the main folder project.
Image from Rolando Barry
Other tips & tricks in Eagle
Here are some other cool things that Eagle allows you to do, in no particular order:
- Hovering over a video will display a bar at the bottom. Dragging your mouse left or right will scrub through the video for a quick glance.

Image from Rolando Barry
- There are some handy tools for editing images, like cropping, flipping horizontal, rotation, 1:1 scale and fit to window.
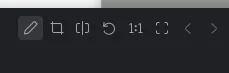
Image from Rolando Barry
- Eagle also allows you to drop down comments on specific parts of an image, for note-taking, feedback or simply as a reminder. These will be saved as comments next to the image. When looking at videos, these will also mark the timestamp at which the note was written.

Image from Rolando Barry

Image from Rolando Barry
On top of the extension, Eagle also has its own screen capture utility that you can bring up with a shortcut. It will let you either capture a region of your choosing, or an entire window. You can also then write, draw and scribble on it with some extra tools. Once you’re done, you can choose to copy it to clipboard, save it to a folder, or directly save it in a folder inside Eagle.
Amazing for visualizing fonts
Image from Rolando Barry
-
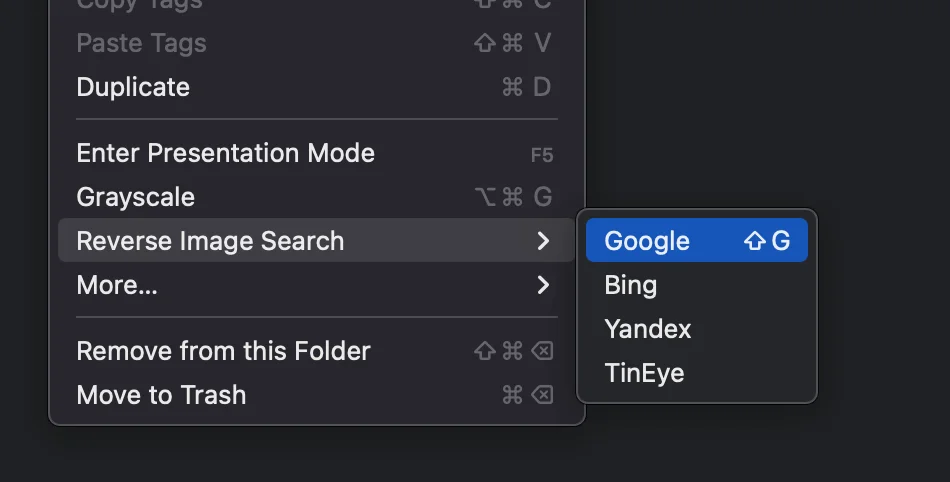
There is a Reverse Image Search button right inside the app. You just right click and choose your engine. Wild, no?
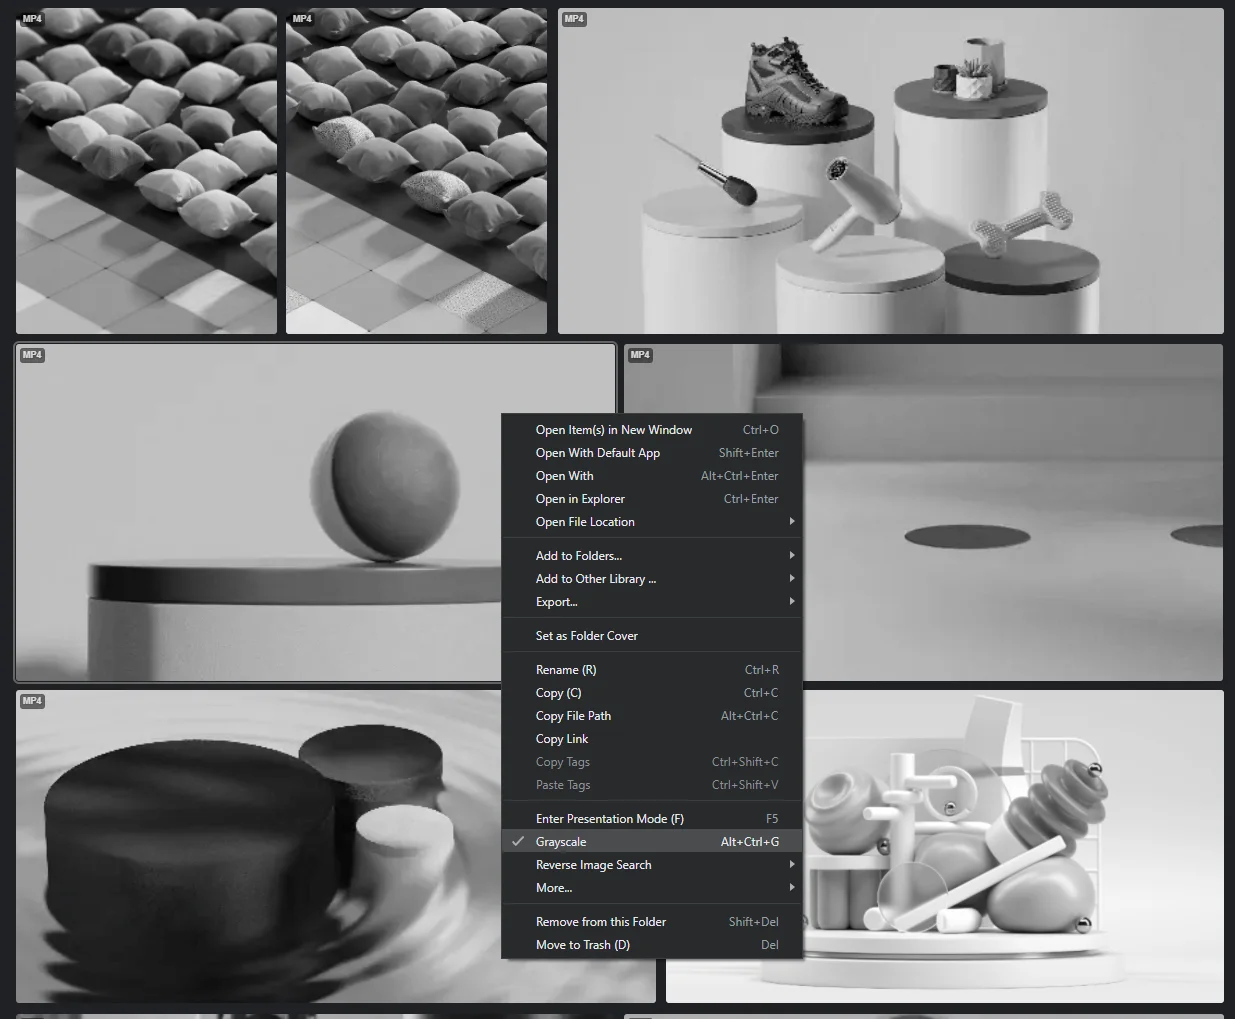
![]()
Image from Rolando Barry Eagle has a Greyscale mode you can enable to turn everything B&W. Useful if you’re looking for contrast or composition in images and want to avoid colorful distractions
![]()
Image from Rolando Barry
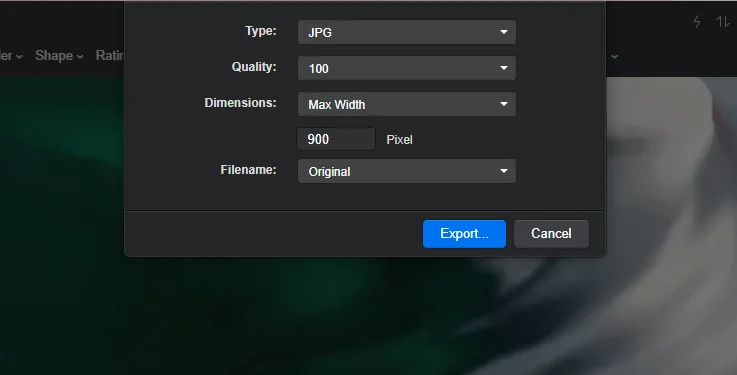
There are pretty cool options to export files from inside Eagle, in case you need a specific file type or size. Your original always lives inside the app.
![]()
Image from Rolando Barry
You can ‘Copy Link’ for specific files, which means, if you’re sharing an Eagle library amongst a team, studio or group of friends, you can just send each other what is essentially a clickable shortcut that will open the Eagle window and take you directly to the file.
![]()
Image from Rolando BarryYou can also have multiple libraries! And switch between them effortlessly.
![]()
Image from Rolando BarryYou can merge two or more images into one simply with the click of a button.
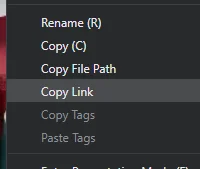
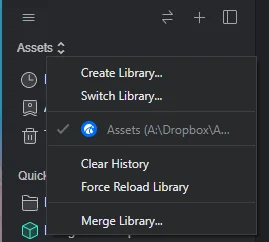
Image from Rolando Barry

Image from Rolando Barry

Image from Rolando Barry

Image from Rolando Barry
There are several more tips and tricks, but I think I’ve gone on for way too long now, so I’ll leave the last few secrets for you to explore, if you’re interested. If you’ve made it all the way here, I assume you’re at least intrigued.
How to get Eagle
Eagle App is $29.95 for a license on two different devices and is available for Windows and Mac. There is a 30-day trial version available so I recommend getting that first and having a look around. You can download it from their cool site here:
Thank you for reading this and I hope you find this as useful as I do! Feel free to reach out to me if you have any questions or are still on the fence about it.
The article is originally written by Rolando Barry- Using Eagle as my Media & Asset Library, you can follow his Twitter, Instagram, Website